On this page
Operation Overlay: Boundaries, Phase Lines, Objectives
An operation overlay shows the plan on the map: control measures such as boundaries, phase lines, the axis of advance and the objective. In map.army each one is a tactical graphic that you find with the Symbol Search, place with a few clicks and label with its designation. This page walks through a company attack overlay from start to finish.
The overlay at a glance
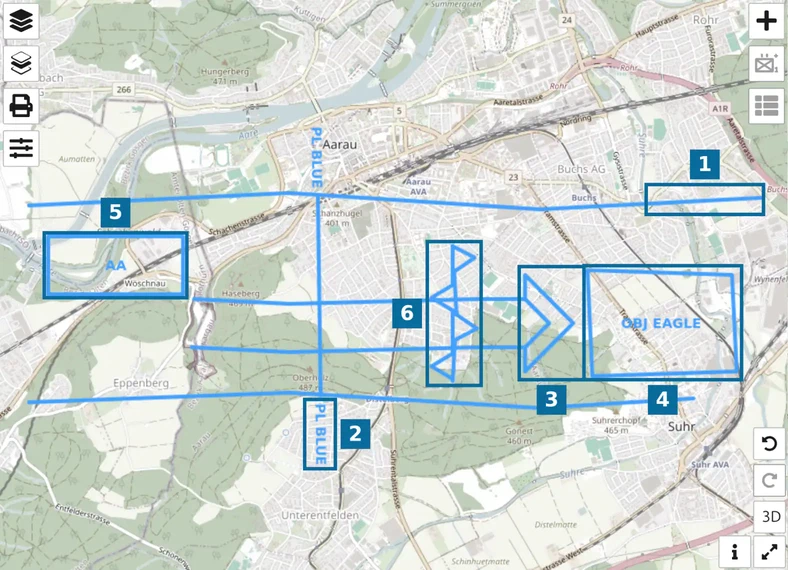
In the screenshot: (1) a boundary, (2) phase line BLUE, (3) the main attack axis, (4) objective EAGLE, (5) the assembly area, (6) an obstacle belt. Draw them on one MilX layer of their own, so the overlay can be saved and handed out on its own.
Find each graphic
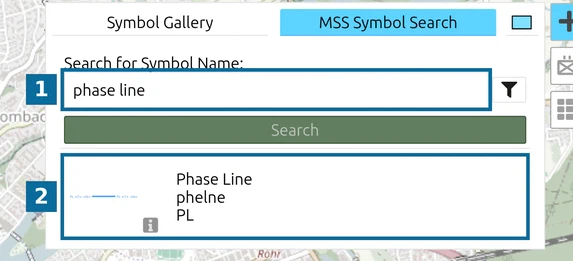
Click Add new MSS Symbol, open the MSS Symbol Search tab, type the term and click the result. In the screenshot: (1) the search field, (2) the result to pick.
| Control measure | Type | Pick the result | Points in the example |
|---|---|---|---|
| Boundary | boundary | Boundaries | 4 |
| Phase line | phase line | Phase Line | 2 |
| Axis of advance | main attack | Main Attack | 4 |
| Objective | objective | Objective | 4, an area |
| Assembly area | assembly area | Assembly Area | 4, an area |
| Obstacle | obstacle | Obstacles General Belt, or a specific obstacle | 3 |
Search in your interface language; an English term finds nothing in a German, French or Italian interface. Axis of advance finds only the airborne and aviation variants: for a ground attack, search for main attack. See Symbol Gallery for more search tips.
Draw it
- Pick the result. The search panel stays open; place your points beside it or close it first.
- Click once on the map for each point. For an area, click its corners.
- Press Space to finish the graphic.
- Repeat for the next graphic.
Two things to know:
- Main Attack starts at the arrowhead. Click the objective end first and the rear end last. The arrowhead scales with the first segment, so keep that one short.
- Points snap to nearby graphics while the magnet button is on, which is the default. That keeps a phase line joined to a boundary. Press S (or click the magnet button) to switch snapping off, and again to switch it on.
To move or reshape a graphic afterwards, see Edit multi-point tactical graphics.
Label it
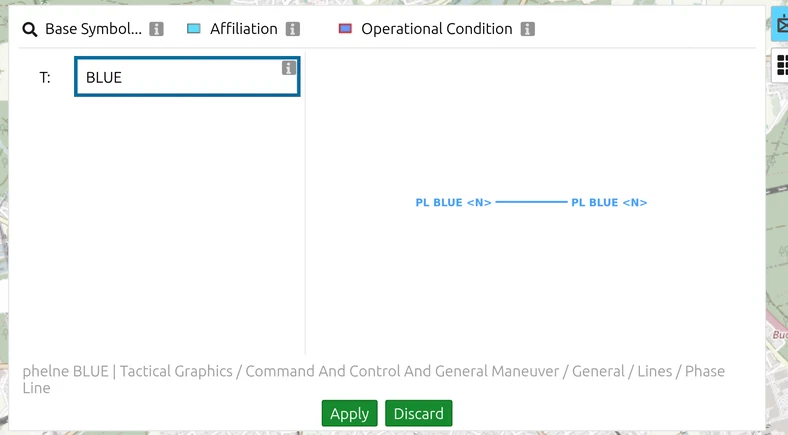
Select the graphic and open the MSS Symbol Editor. Type the unique designation into the T: field and click Apply: BLUE becomes PL BLUE at both ends of the phase line, EAGLE becomes OBJ EAGLE in the objective. Boundaries and assembly areas also take an echelon in B:; the main attack axis has no text field.
Date-time group (DTG): these graphics carry no DTG. Unit symbols have a date-time field among their modifiers, with a picker that shows the time zone set under Unit Settings, Z by default.
Save it and hand it out
- For the order annex or the briefing: a scaled PDF export, or an overlay trace on foil without the background map.
- For other map.army users: save the layer as MilX, or share it.
- For NATO C2 systems: NVG export.
Last updated: