On this page
Work with symbols on MilX layers in map.army
Once you have a few MilX layers, the work moves from the layers themselves to the symbols sitting on them: getting a symbol onto the right layer, finding one again in a crowded situation, and marking a layer as approved when it is ready to hand on.
This page covers the symbol-level work. For what a layer is and how to set one active, see MilX Layers; for the panel and its buttons, see The Layers panel and Layer-Manager.
Move symbols between layers
A symbol always belongs to exactly one layer — the one that was active when you drew it. Putting it somewhere else is a drag, not a cut-and-paste, and it starts in the symbol list rather than on the map:
Select the source layer by clicking its name, so its symbol list opens beneath it.
Turn on reorder mode with the toggle above the list — its tooltip reads Activate / deactivate mode to reorder symbols within a layer or to move symbols to another layer. The first time you hover over the toggle, a short tutorial pops up; close it with its green Finish button before you carry on. Until you do, symbols have no drag handle and cannot be picked up at all. The drag handle is the empty rounded box at the left of each row; it appears once the mode is on. This step is the one that is easy to miss. The toggle is only there while the selected layer is editable — the one with the pencil; on a read-only layer it disappears.

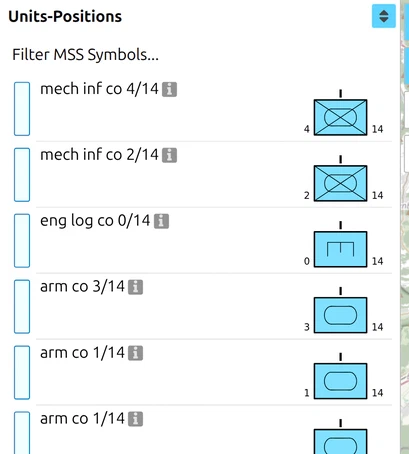
Select the symbols in the list. Ctrl + click adds or removes one symbol. Shift + click selects everything from the nearest symbol that is already selected up to the one you click; Shift + click on a selected symbol clears the selection. On the map, holding Ctrl and dragging a rectangle selects the symbols inside it.
Drag them out of the symbol list onto the target layer’s row in the Layers panel. The target row has to be visible — expand its group if it is collapsed.
All selected symbols that are shown in the list move in one step. Undo (Ctrl + Z) takes the move back.
This is also how you merge two layers: select everything on the source layer, drag it onto the destination, then delete the now-empty source layer.
The same mode reorders symbols within a layer, which is worth knowing because symbol order is draw order — a symbol further up the list is drawn over the ones below it, the same rule as for layers in the Layers panel. Hovering a symbol offers Move the symbol to the top and Move the symbol to the bottom; both jump to the end rather than stepping one place, and if the symbol is part of a selection, the whole selection moves.
Dragging needs the target layer to be visible in the panel. If you have set a filter — Only Visible, Only Approved or Only Editable — the layer you are aiming for may be filtered out of the list. Clear the filter first. On operation layers of map.army pro, the symbol list has two filters of its own with the same trap — hide symbols which are hidden on the map and hide blocked symbols: a symbol filtered out of the list cannot be dragged either.
map.army tells you whether a drop will be accepted: while you drag over a layer row, the row shows an arrow if the symbols may land there and a cross if they may not. A drop is refused onto the layer the symbols already sit on and onto a layer you cannot edit — read-only or locked. An Approved layer accepts dropped symbols. A group header is not a drop target at all, and in a read-only project reordering is not offered.
Find a symbol in a long layer
When the layer dialog is open, the symbol list and the map are synchronised in both directions. Select a symbol in the list and the map centres on it and marks it; select one on the map and the list highlights the matching row. On a layer with fifty symbols this is faster than hunting across the map.
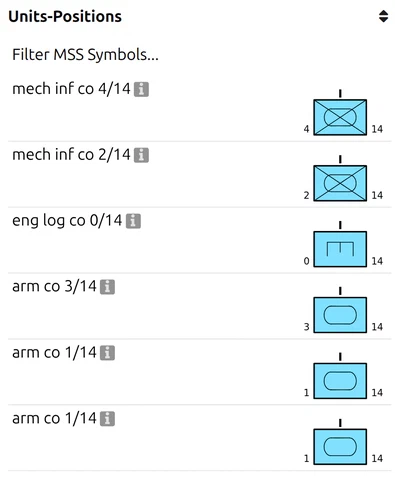
To narrow a long list, type into the Filter MSS Symbols … field at the top of the layer dialog; it appears once a layer holds more than two symbols. It matches any part of the symbol’s name, short name, abbreviation, alias, full name or symbol code, regardless of upper and lower case.
Mark a layer Approved
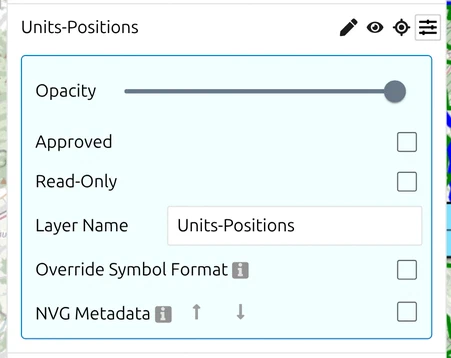
Each MilX layer carries an Approved checkbox, set from the layer’s Settings. It changes how the layer draws:
- Not approved (the default) — symbols render in their affiliation colours: blue for friendly, red for hostile, green for neutral, yellow for unknown.
- Approved — the whole layer renders in black and white, whatever each symbol’s individual Colored setting says. This is the conventional presentation for a layer that has been signed off.
Because it overrides the per-symbol setting, Approved is the fastest way to turn a working layer into a presentation one without touching a single symbol. The per-symbol equivalent is Colored, under Options → Symbol Format.
Where to go next
- MilX Layers — what a layer holds, the active layer, and what survives a reload.
- The Layers panel and Layer-Manager — create, save, load and delete layers.
- Import Overlays — bring in MilX, vector and image layers.
- Export Overlays — save layers out, including older MilX versions.
Last updated: